Laparoscopic view of a ventral hernia

Laparoscopic view of a ventral hernia with incarcerated omentum. The hernia contents must be dissected free from the abdominal wall to expose the hernia defect.
Cutting the mesh prosthesis

Cut the mesh prosthesis to the desired size and mark its intended location on the anterior abdominal wall. The shaded area indicates the approximate outline of the ventral hernia, and the mesh is indicated by crosshatches. The mesh should extend beyond th
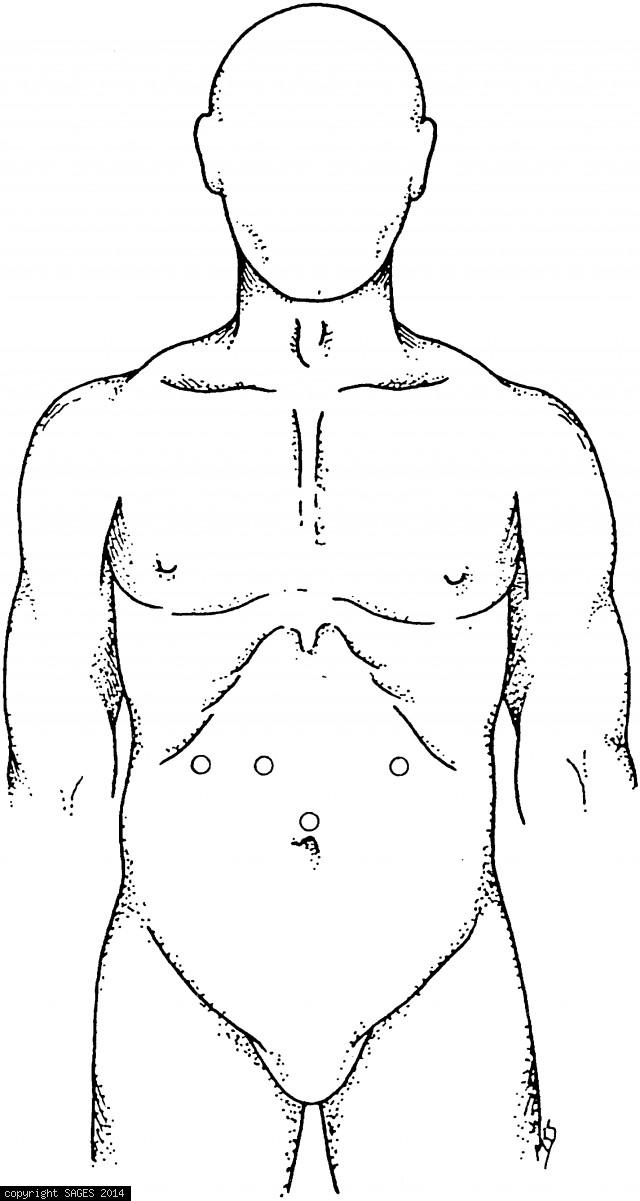
Demonstration of port placement

Demonstration of port placement for repair of a ventral hernia in the upper abdomen. Place the first trocar in the lower midline, 2 or 3 in. inferior to the ventral hernia. Ventral hernias in the lower abdomen require placement of the camera port in the u
Room Setup and Patient Positioning
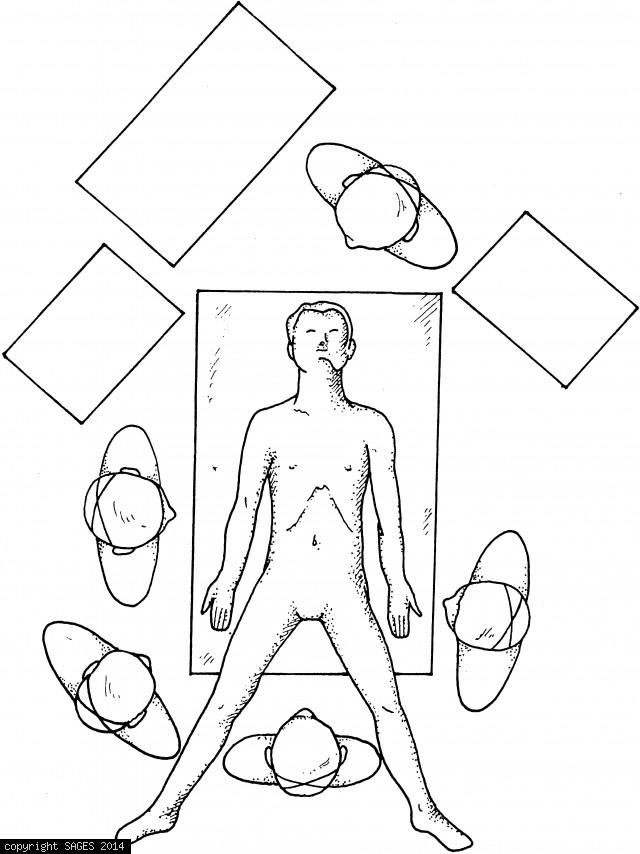
Room setup and patient position for upper abdominal node dissection.
The colon is retracted toward anterior abdominal
The colon is retracted toward the anterior abdominal wall as the vascular pedicle is divided with the linear cutting stapler.
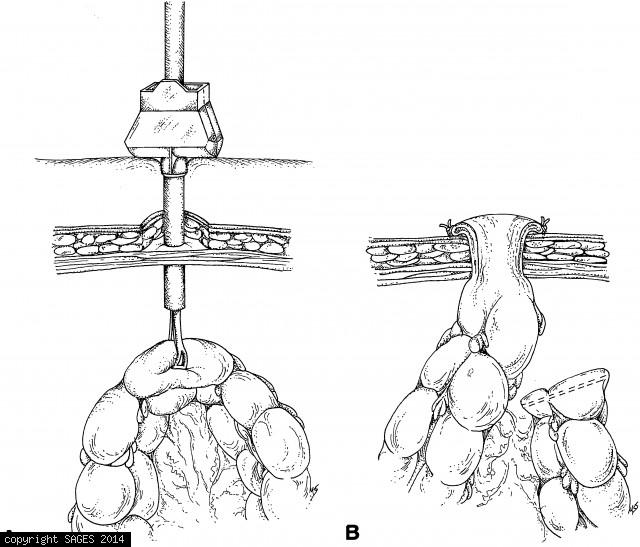
The anvil of the circular stapler
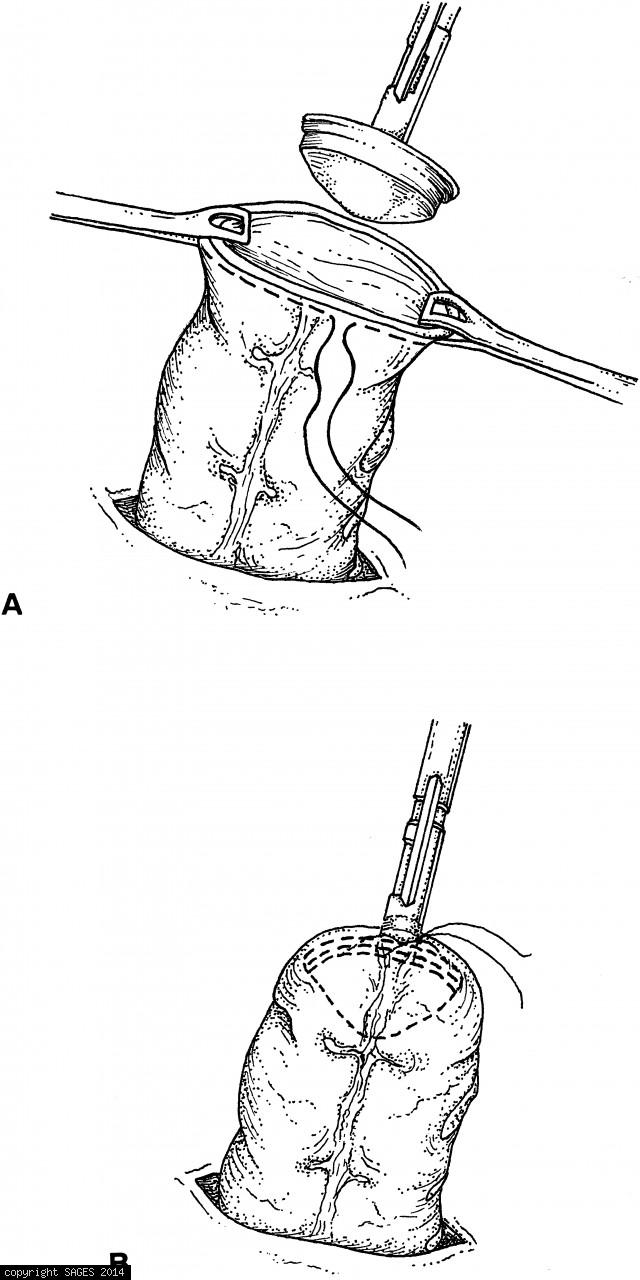
A. The anvil of the circular stapler is inserted in the proximal end of the bowel (which has been drawn out of the abdomen through an enlarged trocar site). B. The pursestring suture is tied. The bowel is then returned to the abdomen.
anastomos is performed in an extracorporeal manner

Terminal ileum, cecum, ascending and proximal transverse colon eviscerated through the small midline incision. Resection and anastomosis will be performed in an extracorporeal manner. The anastomosis is then returned to the abdominal cavity.
Laparoscopic colostomy
Laparoscopic colostomy. A. The preselected colostomy site has been prepared by excising a disk of skin and subcutaneous tissue down to fascia. Fascia is left intact to prevent loss of pneumoperitoneum. A trocar is placed through the center of the ostomy s
Technique for Planar Lifting Device
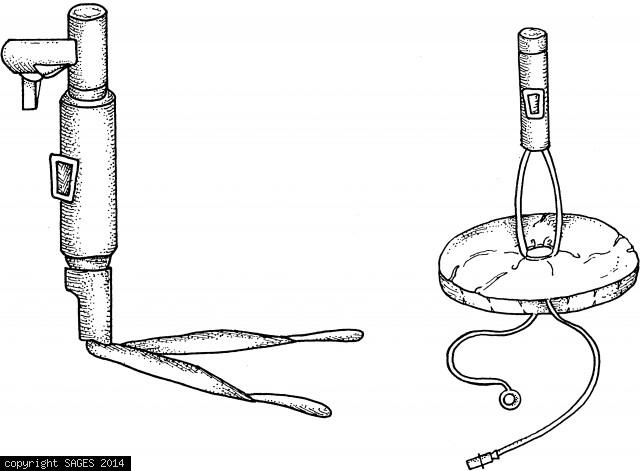
Both a fan-shaped and an inflatable donut-shaped device are available. Each is inserted into the abdomen in a collapsed configuration, then expanded within the peritoneal cavity.
Tubing Placement

Diagram demonstrating the placement of flexible tubing or wire in combination with low-pressure pneumoperitoneum: (A) Banting et al. (1993), (B) Inoue et al. (1993), (C) Go et al. (1995). These techniques can be adapted using readily available materials a
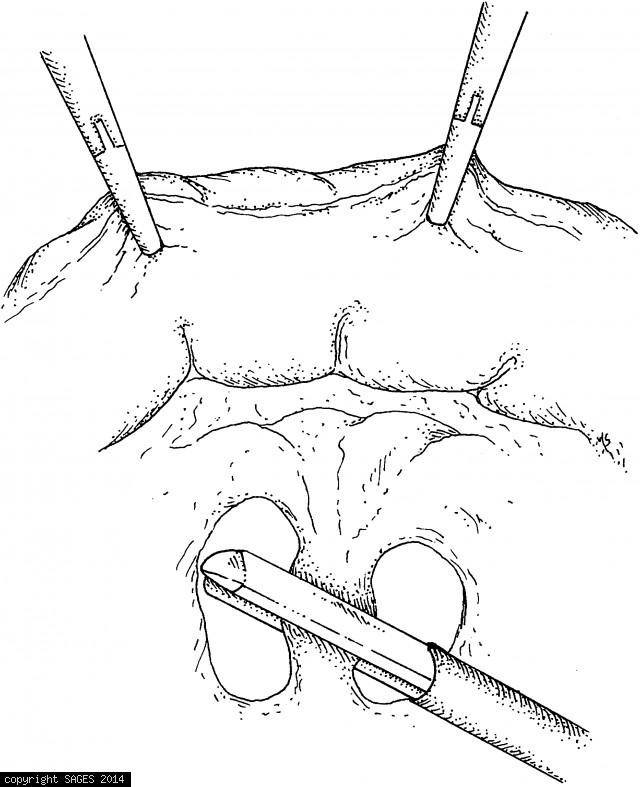
Bleeding From Abdominal Wall
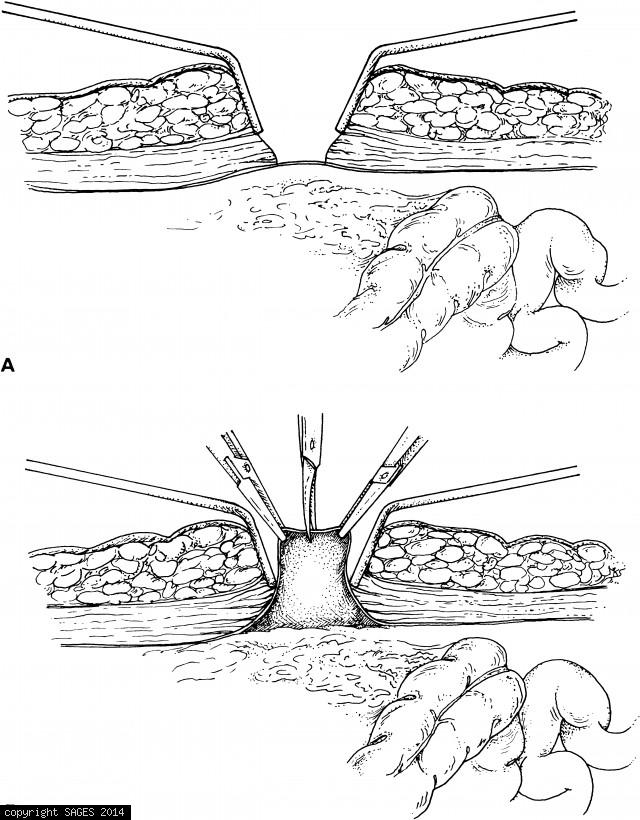
A. Retractors expose peritoneum. B. Peritoneum is elevated and sharply incised. Two fascial sutures are secured to the struts on the sheath of the open cannula. The cone-shaped sleeve is then pushed firmly into the incision and the setscrew is tightene
Insufflator Readings – 2
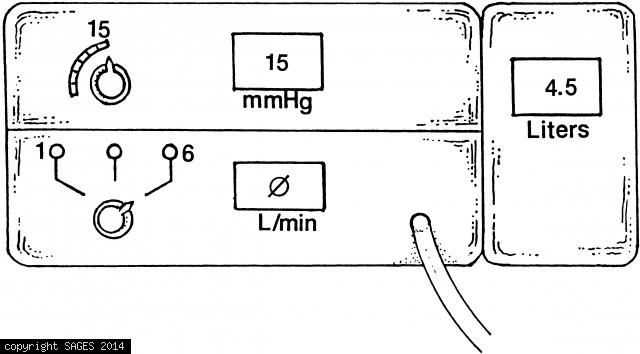
At 15mmHg intra-abdominal pressure, 3 to 6L of CO2 will usually have been insufflated; the registered flow should then fall to 0.
Testing retractable tip of disposable Veress needl
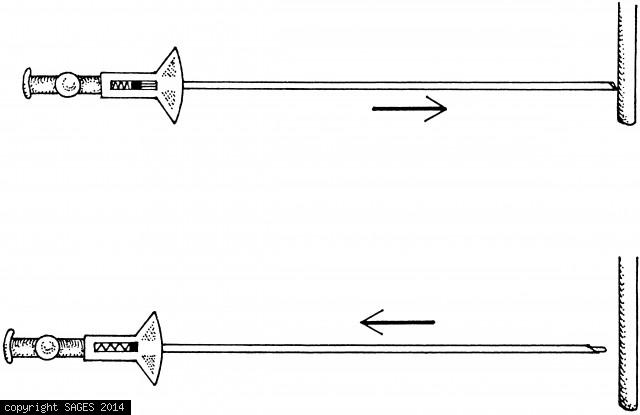
A. Blunt tip retracts as it contacts resistance (e.g., a knife handle). B. When the needle is pulled away from the point of resistance, the blunt tip springs forward and protrudes in front of the sharp edge of the needle.
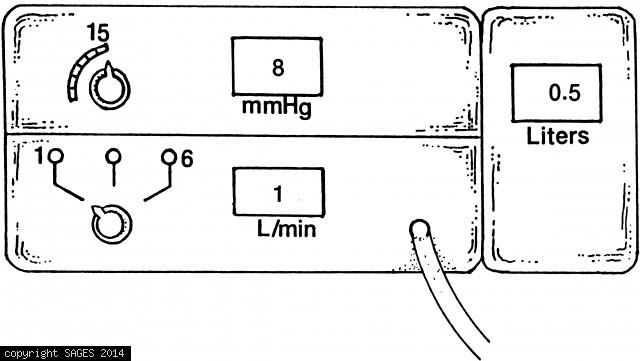
Insufflator testing.

With the insufflation tubing kinked, the intraabdominal pressure should rapidly rise (e.g., 30mmHg), thereby exceeding the preset 15mmHg pressure set point. The flow of CO2 should immediately cease (0 L/min) and an alarm should sound.
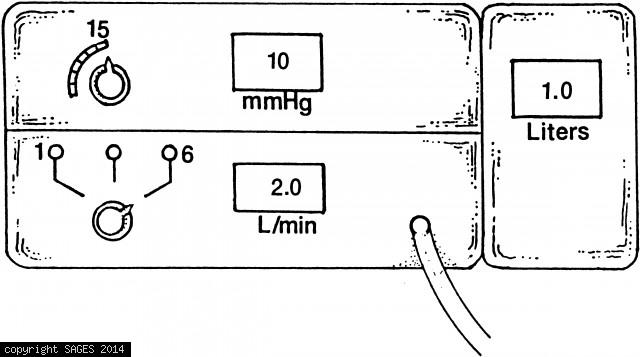
Insufflator testing

With insufflator tubing open (i.e., not connected to Veress needle) and flow rate set at 6 L/min, the intra-abdominal pressure reading obtained through the open insufflation line should be 0mmHg